Hardwood Floor Refinishing NJ protects your hardwood floors from damage, makes them easier to clean, and adds a fresh look. It also extends the life of your feet and can help your home stand out from the competition.
Refinishing hardwood floors requires sanding and staining. Before you start, clear the room of furniture and close windows to keep dust from spreading outside.
Before you begin refinishing, make sure the floor is clean and free of dust and debris. This will allow the final coat of finish to adhere properly. Vacuuming and sweeping are important, but you should also use a damp microfiber cloth or tack cloth to wipe away any loose particles that may have settled on the floorboards.
Next, remove any shoe base molding that is attached to the wood flooring. You can use a pry bar to pull this molding away, but do so gently so that nothing breaks. Once the area is cleared, it’s time to sand your floors. This step is important because if your hardwood floors don’t have an even surface, they won’t adhere well to the new finish. The first sanding pass should be with a medium-grit sandpaper, such as 80-grit.
Once the sanding process is complete, your hardwood floors will be ready for the staining stage. The stain color will play a major role in the overall look of your floors, so be sure to choose carefully. The last thing you want is to have to pay more money to restained your floors because of a bad color choice.
If you’re planning to refinish your hardwood floors yourself, keep in mind that this is a labor-intensive project that requires plenty of patience and attention to detail. It’s also a very dusty job, so be sure to seal off the room that you’re working in and wear appropriate protective gear.
Resurfacing is an alternative to refinishing that involves applying a new topcoat to your existing hardwood floor instead of sanding the entire surface down and starting from scratch. This is a less expensive and faster option for homeowners, but it’s not as durable as refinishing.
If you’re going to go with a resurfacing, be sure to use a water-based polyurethane. This type of finish is easier to apply and less harmful for the environment than oil-based polyurethanes. It’s also more durable than traditional urethanes and won’t discolor as easily. In addition, it’s much less toxic for pets and kids than traditional oil-based polyurethanes.
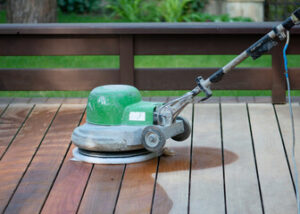
Sanding
Before refinishing hardwood floors, the surface should be thoroughly cleaned. Sweep or vacuum, and then mop with a slightly damp cloth or mop head to remove all dirt and dust that could mar the new finish. Also, it’s a good idea to inspect the floor for protruding nails, which should be hammered down with a nail set to avoid damaging sanding belts and pads when you resand the floors.
If you’re doing the sanding yourself, keep in mind that wood flooring requires more than just one pass with the drum sander. To get a nice smooth finish, you’ll likely need to do multiple passes, with 80-grit, 120-grit and finally 180-grit paper. Depending on the severity of the scratches and gouges on your floor, you may need to do even more rounds.
Once the floor is completely sanded, you’ll need to seal it to protect your work. A few options are available, including water-based polyurethanes and lacquers that require less sanding and drying time than oil-based coatings. Be sure to follow all manufacturer instructions, and apply each coat according to the recommended drying times.
After the floor is completely dry, it’s important to lightly sand it again with 220-grit sandpaper and remove any remaining dust. This will give the floor a clean, consistent surface and allow it to accept the stain better.
It’s also a good time to do a little research. Determine what type of wood your floor is made from, and choose a color that coordinates well with the rest of your house. You’ll also want to test the stain on a small area of your floor to see how it reacts.
When staining, different types of wood respond differently to the same color. A mahogany stain may look darker on pine than it will on oak, for example. You’ll also need to consider the amount of sunlight your floors receive, as they’ll absorb more sun than some other colors.
If your floors are made from engineered wood, check the manufacturer’s specifications to find out how thick the veneer is. Thicker woods can typically be refinished two or more times before needing replacement, while thinner veneers will probably need to be replaced sooner.
Staining
Once the sanding process is complete, you’ll need to apply a stain and varnish. This will introduce a new finish to the wood and protect it from moisture and scratches. It’s a good idea to use water-based products, as they’re typically low in VOCs and dry quickly.
It’s important to choose the right color for your stain. A flooring professional will be able to help you find a color that matches your furniture or decor. If you’re unsure, try staining an inconspicuous area of the floor first. This will allow you to see how the color will look before committing to it on your entire floor.
Before you begin, clear the room of all furniture and move any houseplants. Use a vacuum or backpack vac to remove any dust particles. You can also wipe down the wood with mineral spirits. This will remove any dirt that may hinder the adhesion of the varnish.
When applying the stain, start in a corner furthest from the door. Work in small sections at a time, and make sure to follow the manufacturer’s instructions for application. When you’re finished, apply a second coat and let it dry thoroughly. If you’re working with a wood-stain that contains natural dyes, it may take several weeks for the color to fully set.
Varnish is the top protective coating on a hardwood floor. It’s available in both oil-based and water-based varieties, so choose whichever is best for your environment and budget. Water-based varnishes are typically low in VOCs, so they’re better for indoor environments. However, they’re not as durable as oil-based finishes.
When choosing a varnish, consider how much traffic the floor will receive. High-traffic areas of a home may need two or more coats, while low-traffic areas may only require one or two coats. If you plan to refinish the floors in multiple rooms, it’s a good idea to purchase extra varnish so that you can touch up any spots that need more protection.
Once the varnish dries, you can return to the room and replace any furniture or items you’ve moved. It may take up to 24 hours for the final coat of varnish to dry completely, so be patient and keep the room warm.
Finishing
Refinishing your hardwood floors is a major undertaking. Depending on the size of the area, it can take days to complete. It’s important to have the right tools for the job and a plan of action. Here are some things to consider before you begin:
Clear the room: Remove furniture, curtains, pictures and any other items that could get in the way of your refinishing project. This will make it easier to sand and stain the boards.
Check for protruding nails: Nails that aren’t flush with the floor can damage sanding belts and slow your progress. Remove the nails and nail heads before sanding.
Sand the floor: Once you’ve cleared away all of the old finish, sand the hardwood with a drum sander. Start with the center of the room, and work your way outward. Be sure to use a dust mask and follow all safety precautions.
Stain the floor: After sanding, you’ll be ready to stain the hardwood. Be sure to use a quality stain that’s specifically made for hardwood floors. It should also be low-VOC. Staining is an excellent opportunity to bring out the natural color of the wood and to address any dents or scratches in the boards.
Apply the topcoat: Once you’ve let the stain dry completely, it’s time to apply the topcoat. There are both water-based and oil-based polyurethanes available. We recommend using an oil-based product as it will last longer than a water-based one. Be sure to apply the coats according to the manufacturer’s instructions, and allow each one to dry fully before applying another.
Once the final coat of finish has dried, it’s time to enjoy your beautiful hardwood floors! Be sure to clean your new floors regularly. Regular vacuuming, as well as the occasional sweeping with a broom and a damp microfiber cloth or tack cloth, will help to keep your floors looking their best. Also, be sure to have your wood floors buffed and recoated every six to 12 months or as needed. This will help to maintain the appearance of your floors and reduce the amount of refinishing that will be required in the future.